
Best Blogger Designs, Tips, Tricks, Tools and Basic to Advanced Training

Best Blogger Designs, Tips, Tricks, Tools and Basic to Advanced Training

Best Blogger Designs, Tips, Tricks, Tools, Basic to Advanced Training, Money Making Tips, SEO, Traffic Genaration Methods, Free Templates, Free Hosting Tricks

Hot

Post Top Ad

Your Ad Spot

How To Get Traffic On Your Site Talk

March 08, 2019 0

How To Get Traffic On Your Site Talk


The big problem and I often ask is: How does one have a lot of free traffic on its site? For example, if you take out a new site tomorrow, you pull a new blog or you publish an article, how can we do to bring thousands of people, for example on this article on this site, on this blog?
Read More

How To Make 25$ With Google Adsense Daily

March 08, 2019 0

How to » Make Money Online » Tips & Tricks » How To Make 25$ With Google Adsense Daily

How To Make 25$ With Google Adsense Daily


The HBT System delivers on traffic which converts into money and making sure your business is profitable. earn money ways

In any business online its all about traffic and getting PROFITS and google adsense is best choice for that. We at the HBT SYSTEM will be showing you online marketing like you have never seen before. You will be sharing with our daily reward profits. This model has been proven to make people huge incomes quickly and from solid retail sales.
Read More

Put the Title of the Post in front of the Blog Title to make it more SEO

March 03, 2019 0

Put the Title of the Post in front of the Blog Title to make it more SEO

Putting the title of the post / article is in front of the blog title on the Google search search results so that it is more SEO friendly, is one method / SEO tips that are usually done by most blog owners to improve the SERP position. Because the value of the article title is above the blog title in the eyes of the search engine. So if the target audience for the sampean blog is from the article title query, then this method is powerful enough to improve the SERP. On the other hand, for a very well-known website or blog whose ads often travel on TV or other mass media, I don't think this method needs to be applied. Because most visitors come from the query results of the blog name.

Most of the external templates, free or premium, usually have implemented this method, but there are still some templates that still put the blog title / name in front of the article title, especially the default template from Blogger. Where this will cause a long article title to be cut off on the search engine index results. Surely this is very detrimental right?

To change the post title in front of the blog name in the search engine index results, please follow the steps below:

1. Login to Blogger >> select blog >> click Template >> click edit html. 
2. Look for the code line as below
<title><data:blog.pageTitle/>
</title>

3. Delete the code, then replace it with the code below
<b:if cond='data:blog.pageType == &quot;index&quot;'>
     
<title>
       
<data:blog.pageTitle/>
     
</title>
     
<b:else/>
         
<title>
           
<data:blog.pageName/> ~ <data:blog.title/>
         
</title>
</b:if>
4. Save the template

The ~ sign is the delimiter between the title of the article and the blog title in the search engine index results. Please change it according to your taste, with a sign | or >>.

Note: Changes to the search index results will not be immediately visible to old articles / posts, it can take 1 day or 1 week or more, to speed up changes can be by resending the article url (submit url / take as google). 

Also read the article How to delete blog widgets that cannot be deleted

So many tutorials on how to place the article title in front of the blog title. Sorry if there is something wrong in this paper. Hopefully useful and good luck.
Read More

Make an Adsense Ad Box Next to the Blog Title

March 03, 2019 0

How to Make an Adsense Ad Box Next to the Blog Title

Ad box or ad space next to the blog title has a very high level of visibility, both on desktop and cellular devices. With such conditions, of course the ad space in the blog header has an offer value that is far greater than other ad space on the Blog.
Ad box beside the blog title

Read More

Add Skype Button to Your Website

March 02, 2019 0

How to Add Skype Button to Your Website?

Do you want to include a link into your website for users to connect with your Skype profile? When an user click on your Skype link, he will be asked to launch his Skype application and he can automatically view your profile, leave a voice mail, send a file, add to contacts, chat with you or can get a call.
To add a Skype link follow this syntax:
skype:profile_name?action
Types of actions are:
chat : to chat
call :to call
voicemail : to leave a voice mail
sendfile : to send a file
add : to add to contacts
userinfo : to view profile
For example, my Skype username is lasantha.wam
Chat Link:
<a href='skype:lasantha.wam?chat'>Chat with Me</a>
Call Link:
<a href='skype:lasantha.wam?call'>Call Me</a>
Leave a Voice Mail:
<a href='skype:lasantha.wam?voicemail'>Leave a Voice Mail</a>
Send a File:
<a href='skype:lasantha.wam?sendfile'>Send a File</a>
Add to Contacts:
<a href='skype:lasantha.wam?add'>Add to Contacts</a>
View Profile:
<a href='skype:lasantha.wam?userinfo'>View Profile</a>
If you want to add a Skype image/button link instead of a text link, just replace the anchor text with <img src='YOUR_IMAGE_URL'/>.
For example:
<a href='skype:lasantha.wam?chat'><img src='YOUR_IMAGE_URL'/></a>
Read More

How To Add 5 Tabbed Widget For Blogger

March 02, 2019 0

I found this nice tip in www.bloganol.com .
1.Login to your dashboard--> layout- ->Page Elements
2.Click on 'Add a Gadget' on the sidebar.
3.Select 'HTML/Javascript' and add the code given below.
<!-- widget by Bloganol.blogspot.com -->
<script language="JavaScript" type="text/javascript">
function st2(t){
for(i=1;i<=5;i++){
ts=document.getElementById('tt'+i);
tr = document.getElementById('dd'+i);
ta = document.getElementById('aa'+i);
if(t==i){
if(t==1) ts.className="Tab1";
if(t==2) ts.className="Tab2";
if(t==3) ts.className="Tab3";
if(t==4) ts.className="Tab4";
if(t==5) ts.className="Tab5";
ta.className="srchlinksel2";
ts.style.borderBottom="1px solid #FFFFFF";
tr.style["display"]="block";
tr.style["visibility"]="visible";
}
else{
ts.className="tb2";
ta.className="srchlink2";
ts.style.borderBottom="1px solid #B5D6EF";
tr.style["display"]="none";
tr.style["visibility"]="hidden";
}
}
}
</script>
<!-- CSS Begin //-->
<style type="text/css">.f10 {
FONT-SIZE: 10px; FONT-FAMILY: arial
}
.f11 {
FONT-SIZE: 11px; FONT-FAMILY: arial
}
.f12 {
FONT-SIZE: 12px; FONT-FAMILY: arial
}
.f12r {
FONT-SIZE: 12px; LINE-HEIGHT: 13px; FONT-FAMILY: arial
}
.f12n {
FONT-SIZE: 12px; LINE-HEIGHT: 1.3em; FONT-FAMILY: arial
}
.ft11a {
FONT-SIZE: 11px; LINE-HEIGHT: 13px; FONT-FAMILY: Tahoma
}
.fv9 {
FONT-SIZE: 9px; FONT-FAMILY: verdana
}
.fv10 {
FONT-SIZE: 10px; FONT-FAMILY: verdana
}
.ft11 {
FONT-SIZE: 11px; LINE-HEIGHT: 14px; FONT-FAMILY: Tahoma
}
.fmicro9 {
FONT-SIZE: 9px; FONT-FAMILY: Microsoft Sans Serif
}
A.srchlink:link {
COLOR: #2864b4; TEXT-DECORATION: none
}
A.srchlink:visited {
}
A.srchlinksel:link {
CURSOR: text; COLOR: #000000; TEXT-DECORATION: none
}
A.srchlinksel:visited {
CURSOR: text; COLOR: #000000; TEXT-DECORATION: none
}
A.srchlink2:link {
COLOR: #2864b4; TEXT-DECORATION: underline
}
A.srchlink2:visited {
COLOR: #2864b4; TEXT-DECORATION: underline
}
A.srchlinksel2:link {
CURSOR: text; COLOR: #000000; TEXT-DECORATION: none
}
A.srchlinksel2:visited {
CURSOR: text; COLOR: #000000; TEXT-DECORATION: none
}
.tb2 {
FILTER: progid:DXImageTransform.Microsoft.Gradient
(GradientType:0,StartColorStr:'#EEF5FB',EndColorStr:'#D9E9F6');BACKGROUND-COLOR: #d9e9f6
}
.tbmain2 {
BACKGROUND-COLOR: #ffffff
}
.lfttbl {
FILTER: progid:DXImageTransform.Microsoft.Gradient
(GradientType:0,StartColorStr:'#DEFFC6',EndColorStr:'#B7E4A2'); BACKGROUND-COLOR: #deffc6
}
.rttbl {
BORDER-RIGHT: #b5d6ef 1px solid; BORDER-TOP: #b5d6ef 1px solid; FILTER: progid:DXImageTransform.Microsoft.Gradient
(GradientType:0,StartColorStr:'#EEF5FB',EndColorStr:'#DEEFF7'); BORDER-LEFT: #b5d6ef 1px solid; BORDER-BOTTOM: #b5d6ef 1px solid; BACKGROUND-COLOR: #eef5fb
}
.rttblx {
BORDER-RIGHT: #b5d6ef 1px solid; BORDER-TOP: #b5d6ef 1px solid; BORDER-LEFT: #b5d6ef 1px solid; BORDER-BOTTOM: #b5d6ef 1px solid; BACKGROUND-COLOR: #ffffff
}
.rt_tbl {
BORDER-RIGHT: #b5d6ef 1px solid; BORDER-TOP: 0px; BORDER-LEFT: #b5d6ef 1px solid; BORDER-BOTTOM: #b5d6ef 1px solid; BACKGROUND-COLOR: #b0dafd
}
.toptbl {
FILTER: progid:DXImageTransform.Microsoft.Gradient
(GradientType:0,StartColorStr:'#4A84AD',EndColorStr:'#00426B'); BACKGROUND-COLOR: #00426b
}
.srchtbl {
FILTER: progid:DXImageTransform.Microsoft.Gradient
(GradientType:0,StartColorStr:'#FFFFFF',EndColorStr:'#A5DEDE'); BACKGROUND-COLOR: #a5dede
}
.Tab1 {
FILTER: progid:DXImageTransform.Microsoft.Gradient
(GradientType:0,StartColorStr:'#FEDFB3',EndColorStr:'#FFFFFF');
BACKGROUND-COLOR: #fedfb3
}
.Tab2 {
FILTER: progid:DXImageTransform.Microsoft.Gradient
(GradientType:0,StartColorStr:'#B39DFE',EndColorStr:'#FFFFFF');
BACKGROUND-COLOR: #b39dfe
}
.Tab3 {
FILTER: progid:DXImageTransform.Microsoft.Gradient
(GradientType:0,StartColorStr:'#F6FE9D',EndColorStr:'#FFFFFF');
BACKGROUND-COLOR: #f6fe9d
}
.Tab4 {
FILTER: progid:DXImageTransform.Microsoft.Gradient
(GradientType:0,StartColorStr:'#FEAF9D',EndColorStr:'#FFFFFF');
BACKGROUND-COLOR: #feaf9d
}
.Tab5 {
FILTER: progid:DXImageTransform.Microsoft.Gradient
(GradientType:0,StartColorStr:'#9DFEA5',EndColorStr:'#FFFFFF');
BACKGROUND-COLOR: #9dfea5
}
A {
TEXT-DECORATION: none
}
A:hover {
TEXT-DECORATION: underline}
</style>
<!-- CSS End //-->
<!-- Widget Code Ends Here -->
<!-- widget by Bloganol.blogspot.com -->
<table border="0" cellspacing="0" cellpadding="0"
width="380">
<tbody>
<tr>
<td align="middle" onclick="st2('1')" height="22" id="tt1"
style="BORDER-RIGHT: #b5d6ef 1px solid; BORDER-TOP: #b5d6ef
1px solid; BORDER-LEFT: #b5d6ef 1px solid" width="70"
class="Tab1"><a id="aa1"
class="srchlinksel2" href="javascript:undefined"><font
class="f12"><b>TAB1</b></font></a></td>
<td style="BORDER-BOTTOM: #b5d6ef 1px solid" width="2">
<table border="0" cellspacing="0" cellpadding="0" width="2">
<tbody>
<tr>
<td width="2"></td></tr></tbody></table></td>
<td align="middle" onclick="st2('2')" height="22" id="tt2"
style="BORDER-RIGHT: #b5d6ef 1px solid; BORDER-TOP: #b5d6ef
1px solid; BORDER-LEFT: #b5d6ef 1px solid; BORDER-BOTTOM:
#b5d6ef 1px solid" width="47"
class="tb2"><a id="aa2"
class="srchlink2" href="javascript:undefined"><font
class="f12"><b>TAB2</b></font></a></td>
<td style="BORDER-BOTTOM: #b5d6ef 1px solid" width="2">
<table border="0" cellspacing="0" cellpadding="0" width="2">
<tbody>
<tr>
<td width="2"></td></tr></tbody></table></td>
<td align="middle" onclick="st2('3')" height="22" id="tt3"
style="BORDER-RIGHT: #b5d6ef 1px solid; BORDER-TOP: #b5d6ef
1px solid; BORDER-LEFT: #b5d6ef 1px solid; BORDER-BOTTOM:
#b5d6ef 1px solid" width="62"
class="tb2"><a id="aa3"
class="srchlink2" href="javascript:undefined"><font
class="f12"><b>Tab3</b></font></a></td>
<td style="BORDER-BOTTOM: #b5d6ef 1px solid" width="2">
<table border="0" cellspacing="0" cellpadding="0" width="2">
<tbody>
<tr>
<td width="2"></td></tr></tbody></table></td>
<td align="middle" onclick="st2('4')" height="22" id="tt4"
style="BORDER-RIGHT: #b5d6ef 1px solid; BORDER-TOP: #b5d6ef
1px solid; BORDER-LEFT: #b5d6ef 1px solid; BORDER-BOTTOM:
#b5d6ef 1px solid" width="48"
class="tb2"><a id="aa4"
class="srchlink2" href="javascript:undefined"><font
class="f12"><b>Tab4</b></font></a></td>
<td style="BORDER-BOTTOM: #b5d6ef 1px solid" width="2">
<table border="0" cellspacing="0" cellpadding="0" width="2">
<tbody>
<tr>
<td width="2"></td></tr></tbody></table></td>
<td align="middle" onclick="st2('5')" height="22" id="tt5"
style="BORDER-RIGHT: #b5d6ef 1px solid; BORDER-TOP: #b5d6ef
1px solid; BORDER-LEFT: #b5d6ef 1px solid; BORDER-BOTTOM:
#b5d6ef 1px solid" width="52"
class="tb2"><a id="aa5"
class="srchlink2" href="javascript:undefined"><font
class="f12"><b>Tab5</b></font></a></td></tr>
<tr>
<td colspan="9">
<div style="BORDER-RIGHT: #b5d6ef 1px solid; BORDER-TOP:
0px; BORDER-LEFT: #b5d6ef 1px solid; WIDTH: 380px;
BORDER-BOTTOM: 0px"
><!-- Main Headlines Begin //-->
<table border="0" cellspacing="0" cellpadding="0"
width="380" height="5">
<tbody>
<tr>
<td height="5"></td></tr></tbody></table>
&nbsp;&nbsp; <font color="#797979" class="f10"
>
<!-- wmlheadline begin -->
<!-- TDate Begin -->
<!-- Date Begin -->
Browse Items</font>
<!-- Date End -->
<!-- TDate End -->
<div id="dd1" style="BORDER-RIGHT: #b5d6ef 0px solid;
BORDER-TOP: 0px; DISPLAY: block; VISIBILITY: visible;
BORDER-LEFT: #b5d6ef 0px solid; WIDTH: 380px; BORDER-BOTTOM:
#b5d6ef 1px solid"
>
<table border="0" cellspacing="0" cellpadding="0"
width="380">
<tbody>
<tr>
<td width="14"></td>
<td valign="top"><font color="#16387c" class="f12n">Tab 1
Content
</font></td>
</tr>
<tr>
<td colspan="2" align="right"><font class="f10"><b> Widget
by <a href="http://bloganol.blogspot.com/2008/03/5-tabbed-content-widget-for-blogger.html"
target="_blank">Bloganol</a></b>
&nbsp; </font></td></tr>
<tr>
<td height="4"></td></tr></tbody></table></div><!-- Main
Headlines End //--></div>
<div id="dd2" style="BORDER-RIGHT: #b5d6ef 1px solid;
BORDER-TOP: 0px; DISPLAY: none; VISIBILITY: hidden;
BORDER-LEFT: #b5d6ef 1px solid; WIDTH: 380px; BORDER-BOTTOM:
#b5d6ef 1px solid"
><!-- News Begin //-->
<table border="0" cellspacing="0" cellpadding="0"
width="380">
<tbody>
<tr>
<td width="14"></td>
<td valign="top"><font color="#16387c" class="f12n">Tab 2
Content
</font></td></tr>
<tr>
<td colspan="2" align="right"><font class="f10"><b> Widget
by <a href="http://bloganol.blogspot.com/2008/03/5-tabbed-content-widget-for-blogger.html"
target="_blank">Bloganol</a></b>
&nbsp; </font></td></tr>
<tr>
<td height="4"></td></tr></tbody></table><!-- News End
//--></div>
<div id="dd3" style="BORDER-RIGHT: #b5d6ef 1px solid;
BORDER-TOP: 0px; DISPLAY: none; VISIBILITY: hidden;
BORDER-LEFT: #b5d6ef 1px solid; WIDTH: 380px; BORDER-BOTTOM:
#b5d6ef 1px solid"
><!-- Business Begin //-->
<table border="0" cellspacing="0" cellpadding="0"
width="380">
<tbody>
<tr>
<td width="14"></td>
<td valign="top"><font color="#16387c" class="f12n">Tab 3
Content
</font></td></tr>
<tr>
<td colspan="2" align="right"><font class="f10"><b> Widget
by <a href="http://bloganol.blogspot.com/2008/03/5-tabbed-content-widget-for-blogger.html"
target="_blank">Bloganol</a></b>
&nbsp; </font></td></tr>
<tr>
<td height="4"></td></tr></tbody></table><!-- Business End
//--></div>
<div id="dd4" style="BORDER-RIGHT: #b5d6ef 1px solid;
BORDER-TOP: 0px; DISPLAY: none; VISIBILITY: hidden;
BORDER-LEFT: #b5d6ef 1px solid; WIDTH: 380px; BORDER-BOTTOM:
#b5d6ef 1px solid"
><!-- Movies Begin //-->
<table border="0" cellspacing="0" cellpadding="0"
width="380">
<tbody>
<tr>
<td width="14"></td>
<td valign="top"><font color="#16387c" class="f12n">Tab 4
Content
</font></td>
</tr>
<tr>
<td colspan="2" align="right"><font class="f10"><b> Widget
by <a href="http://bloganol.blogspot.com/2008/03/5-tabbed-content-widget-for-blogger.html"
target="_blank">Bloganol</a></b>
&nbsp; </font></td></tr>
<tr>
<td height="4"></td></tr></tbody></table><!-- Movies End
//--></div>
<div id="dd5" style="BORDER-RIGHT: #b5d6ef 1px solid;
BORDER-TOP: 0px; DISPLAY: none; VISIBILITY: hidden;
BORDER-LEFT: #b5d6ef 1px solid; WIDTH: 380px; BORDER-BOTTOM:
#b5d6ef 1px solid"
><!-- Sports Begin //-->
<table border="0" cellspacing="0" cellpadding="0"
width="380">
<tbody>
<tr>
<td width="14"></td>
<td valign="top"><font color="#16387c" class="f12n">Tab 5
Content
</font></td></tr>
<tr>
<td colspan="2" align="right"><font class="f10"><b> Widget
by <a href="http://bloganol.blogspot.com/2008/03/5-tabbed-content-widget-for-blogger.html"
target="_blank">Bloganol</a></b>
&nbsp; </font></td></tr>
<tr>
<td
height="4"></td></tr></tbody></table>
<!-- Widget Code Ends Here -->
4.Now Replace TAB1,TAB2,TAB3,TAB4,TAB5 with your Tab Header Title and Replace Tab 1Content,Tab 2 Content,Tab 3 Content,Tab 4 Content,Tab 5 Content with your tab content.
5.Now click Save and you are done.
Read More

How To Embed a Web Page on Another Site

March 02, 2019 0

1.Login to your dashboard--> layout- ->Page Elements
2.Click on 'Add a Gadget' on the sidebar.
3.Select 'HTML/Javascript' and add the code given below and click save.
<iframe height="400" width="90%" frameBorder="0" src="URL OF WEB PAGE">your browser does not support IFRAMEs</iframe>


Note :
 Remember to replace URL OF WEB PAGE,with the url you want to embed into your site.You can change height,width.

Look at the example below.
<iframe height="400" width="90%" frameBorder="0" src="http://google.com">your browser does not support IFRAMEs</iframe>
Now you are done.
Read More

How To Add One Click Sitemaps Submitter to blogger

March 01, 2019 0

 How To Add One Click Sitemaps Submitter to blogger

With this tool your visitors can directly notify Google, Yahoo!, Ask.com and Moreover.com about their new or updated sitemaps file.
1.Login to your dashboard--> layout- ->Page Elements
2.Click on 'Add a Gadget' on the sidebar.
3.Select 'HTML/Javascript' and add the code given below and click save.
Read More

How To Add Indexed Pages Checker to blogger

March 01, 2019 0

 How To Add Indexed Pages Checker to blogger


1.Login to your dashboard--> layout- ->Page Elements
2.Click on 'Add a Gadget' on the sidebar.
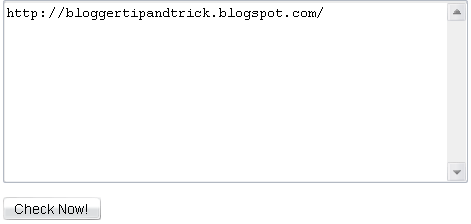
3.Select 'HTML/Javascript' and add the code given below and click save.
<form method ='post' action = 'http://www.seocompany.ca/tool/indexed-pages.php'>
<textarea name ='urls' cols=50 rows = 10></textarea><p>
<input type = 'submit' name = 'submit' value ='Check Now!'>
</form>
Now you are done.Look at the picture below.
Read More

How To Add Google News Widget To Blogger

March 01, 2019 0
1.Login to your dashboard--> layout- ->Page Elements
2.Click on 'Add a Gadget' on the sidebar.
3.Select 'HTML/Javascript' and add the code given below and click save.
<iframe frameborder="0" width="300" height="250" marginwidth="0" marginheight="0"
src="http://www.google.com/uds/modules/elements/newsshow/iframe.html?topic=h,w,b,n,t&rsz=small&format=300x250">
</iframe>
Now you are done.Look at the example below.

Read More

How To Add Feed Burner Email Subscriptions to Blogger

March 01, 2019 0
Using Feedburner, you are able to instantly have an email subscription service for your blog. Every day that you post something new in the blog, an email is sent out to the people who have subscribed to your blog. You don't have to do anything. People join the list and leave the list of their own free will; again, You don't have to do anything. You can make some choice about the way the email is configured, but Feedburner does all the work of actually maintaining the list and sending out the email.
1. Login to your Feedburner account.
2. Click on the Feed Title.
3. Click on Publicize Tab.
4.Now Click on Email Subscriptions.
5. Now Click on "Activate" Button.
6. Now Choose the Blogging Platform as "Blogger"
7. Then you will get code . Copy and paste the code in your blog where ever you like to add Feed Burner Email Subscriptions Form.
Read More

How To Add Feeds For LABELS in Blogger

March 01, 2019 0
How To Add Feeds For LABELS in Blogger

If you want to add feeds for labels in your blog read this post.For easy explanation I use my blogspot url.If you have a Blogspot blog:
URL Address : http://YOURBLOG.blogspot.com/
example :- http://bloggertipandtrick.blogspot.com/
FEED Address: http://YOURBLOG.blogspot.com/feeds/posts/default
example :- http://bloggertipandtrick.blogspot.com/feeds/posts/default
LABEL Address : http://YOURBLOG.blogspot.com/search/label/labelname
example :- http://bloggertipandtrick.blogspot.com/search/label/Templates
To Add a feed for your label your, feed address should like this :
http://YOURBLOG.blogspot.com/feeds/posts/default/-/labelname
example :- http://bloggertipandtrick.blogspot.com/feeds/posts/default/-/Templates
If you have spaces in your label, your feed address should like this :
example :- http://bloggertipandtrick.blogspot.com/feeds/posts/default/-/Change%20Template
Note : If you want to show your latest post under a label follow the steps below.
1.Login to your dashboard--> layout- ->Page Elements
2.Click on 'Add a Gadget' on the sidebar.
3.Click on 'Feed' .
4.Add feed address for your label and click continue.Look at the example below.
5.Now customize your feed showing setting an click save.
Now you are done.
Read More

How To Add Google Backlinks Checker

March 01, 2019 0
How To Add Google Backlinks Checker

1.Login to your dashboard--> layout- ->Page Elements
2.Click on 'Add a Gadget' on the sidebar.
3.Select 'HTML/Javascript' and add the code given below and click save.
<form method="get" action="http://www.google.com/search" target="_blank" rel="nofollow"><input name="q" value="link:" maxlength="255" size="40" type="text"><input value="Google Backlinks" type="submit"><input value="en" name="hl" type="hidden"></form>
It will look like this.
Note : To check google backlinks,Enter URL with http:// after the word link:
Now you are done.
Read More

How to Create a Free Contact Form for your Blog

March 01, 2019 0

How to Create a Free Contact Form for your Blog


Contact Form is essential for Blogs and Websites. Create a contact form for your blog using FoxyFormFoxyForm provides the Anti-spam protection for your Website. This article I show you How to create a contact form for your blog.

Step 1:


Search FoxyForm.

Step 2:


Select your options like Title, Name and Email for your contact form.

                              How To Add a Custom Template For Your Blog

Step 3:


Choose Background Color, Font color and Font Style.

Step 4:


Enter Your Email Address.
Clock on Anti-Spam Protection.

Step 5:


This is a Preview Contact form.

Step 6:


Click on Create Formular.

Step 7:


Copy the HTML Code.

Step 8:


Go to your Blogger Dashboard.
Click on New Post.
Chose HTML.

Step 9:


Enter the Post title.
Paste HTML code.
Finally publish your post.
Read More

How To Add Different type Auto Scrolling Text or Marquee Text

March 01, 2019 0

How To Add Different type Auto Scrolling Text or Marquee Text


This post explains you how to add Scrolling text to your blogger sidebars,blog posts,etc. This is a
another way to attract the visitors to your blog.
Use below codes to add Scrolling Text to your blogger post or widgets.
Read More

How To Redirect Blogger URL To Another URL

March 01, 2019 0

How To Redirect Blogger URL To Another URL


1.Log in to your dashboard--> layout- -> Edit HTML
2.Scroll down to where you see <head> tag.
3.Add below code into your template just after the <head> tag.
<meta http-equiv="refresh" content="0;url=http://yournewurl.com"/>
It should Look Like This.
<head>

<meta http-equiv="refresh" content="0;url=http://yournewurl.com"/>
4.Replace http://yournewurl.com with the URL you want to redirect your old blog.
5.Click on Save Templates and you are done.
Now your blog traffic will be redirected to your new address.
Read More

Now, use Google's complaint form to report fraud on Maps

March 01, 2019 0


Now, use Google's complaint form to report fraud on Maps


Now, use Google's complaint form to report fraud on Maps 
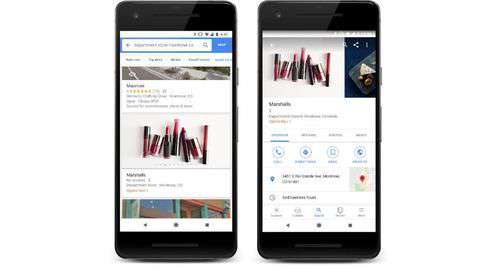
Google has launched a handy new way to combat the issue of fraudulent activity on Maps.
The search giant has started Business Redressal Complaint Form allowing Maps users to report cases of fraud or fake information related to businesses.
It can be used by anyone who notices fake information on the platform, intended to harm businesses or to fool the customers.
Here's more.


How Google Maps' businesses plagued by fraudsters 

As Google Maps' business information relies on publicly-sourced data, it allows users to edit the information related to businesses with the popular 'Suggest an edit' option.
However, sometimes, bad actors, competitors, and others use this option to modify a local business' authentic information.
They change open hours, phone numbers, addresses or even URLs to hurt the entity and its potential/regular customers.

Sometimes fraudsters even target customers with this option 
With the new complaint form, users witnessing such activity can report it directly to Google.
The reporters, as Google says, will have to provide their own details along with the name and location of the business and the piece of information (URL, number) that might lead to fraud on Maps.
Notably, they'll also have to upload screenshots and provide a description of the issue.


Submission might not always lead to action, says Google 
While this option offers a reliable way to combat fraud stemming from Google Maps, it's important to note that submitting a complaint might not always mean that action will be taken.
Google will review your complaint and if it doesn't appear credible, the company might not take any action.
Also, if the complaint is not related to fake business information, it won't be reviewed.
Read More

How To Add Comment Form Under Every Post

February 27, 2019 0
Commenting is a very helpful feature for every bloggers,Because They can know what visitors think about their site.We can easily integrate comment form under every post with no extra effort.To do this follow these simple steps.
log in to your dashboard--> Setting- -> Comments
Now goto "Comment Form Placement" and Check "Embedded below post" Option.
Click on Save Settings.You have successfully embedded Comment form in your blog.
Note : Wait !!! If Above method doesn't work for your template continue with below steps.(including above step)
Go to Layout- -> Edit HTML.
Click on "Expand Widget Templates".
Scroll down to till you see below code:
<b:include data='post' name='comments'/>
Now copy and paste below code immediately below the above code:
<b:include data='post' name='comment-form'/>
Now save your template.You are done.
Read More

Post Top Ad

Your Ad Spot